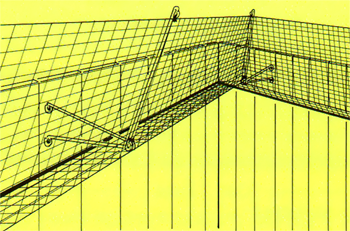
A. Screw the 16 inch brackets 8 to 12 feet apart below the top of fence. Then bolt the 20″ rods to bracket ends.
B. Start at one end of fence and screw netting attachment edge along a horizontal line below brackets.
C. Bring netting up and secure to bracket and rod ends with twist ties.
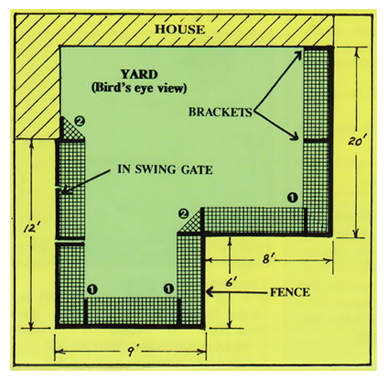
1. At outside corners, (corners facing away from yard) place one bracket 16 inches from corner.
2. At inside corners, (corners facing into the yard) place one bracket on each side of corner.
Tools Needed
 Scissors and a drill motor with a 1/4 inch and 5/16 inch magnetic hex head bit will do most of the work. Self-drilling screws (included in each kit) replace drill bits.
After the brackets are screwed to the fence, the net banding attachment edge is secured to the fence from corner to corner. This makes a tight fit so cats can’t get between the netting and fence. The banding and netting wrap easily around corners without cutting.
If two or more kits are needed, they can be easily fastened together. The netting is then brought up and connected to the brackets with heavy duty, weather proof twist ties. These eliminate sag and keep the netting secure and tight on the brackets.
 For a WOOD or VINYL FENCE, screw brackets and netting attachment edge to fence.
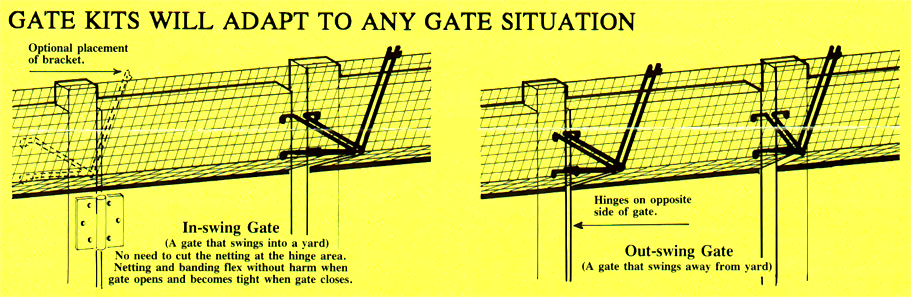
 For a WIRE or CHAIN LINK FENCE, if steel posts exist, attach brackets with self-drilling screws. If that is undesirable, they may be attached with automotive hose clamps (not furnished in kit).
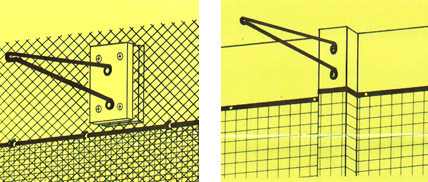 Optional bracket mount: Sandwich fence wire between two